-
Table of Contents
“Master the Art of Sculpting Your Face: The Ultimate Guide to Contouring and Highlighting”
Introduction
“The Ultimate Guide to Contouring and Highlighting” is a comprehensive manual designed to demystify the art of sculpting and enhancing facial features through makeup. This guide delves into the techniques and tools necessary to master contouring and highlighting, offering step-by-step instructions, expert tips, and visual aids. Whether you’re a beginner looking to understand the basics or an experienced makeup enthusiast aiming to refine your skills, this guide provides all the knowledge you need to achieve a flawless, professional look. From understanding face shapes to selecting the right products, “The Ultimate Guide to Contouring and Highlighting” equips you with the confidence and expertise to transform your makeup routine.
Mastering The Basics: Essential Tools And Products For Contouring And Highlighting
Contouring and highlighting have become essential techniques in the world of makeup, transforming the way we enhance our natural features. To master these skills, it’s crucial to start with the right tools and products. The journey begins with understanding the essentials, which can make all the difference in achieving a flawless look.
First and foremost, selecting the right contouring products is key. Contouring typically involves using a product that is a few shades darker than your natural skin tone to create shadows and define your features. There are various forms of contour products available, including powders, creams, and sticks. Each has its own benefits; powders are great for oily skin and provide a matte finish, while creams and sticks offer a more dewy, natural look and are easier to blend. It’s important to choose a product that complements your skin type and tone.
Equally important is the highlighter, which is used to accentuate the high points of your face, such as the cheekbones, brow bones, and the bridge of the nose. Highlighters come in powder, cream, and liquid forms. Powders are ideal for a subtle glow, while creams and liquids can provide a more intense, radiant finish. When selecting a highlighter, consider your skin’s undertone; those with cool undertones might opt for a highlighter with a silver or pearl finish, while warm undertones pair well with gold or champagne hues.
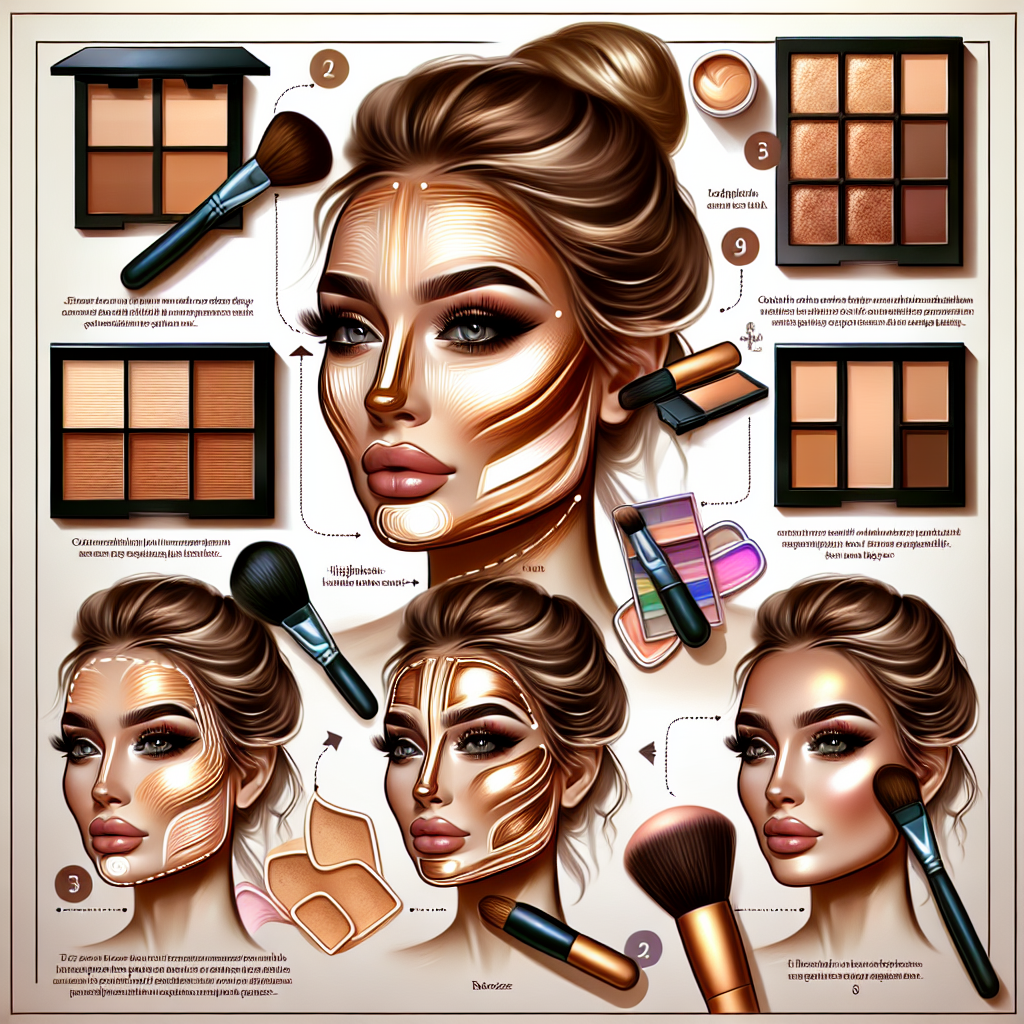
The tools you use can significantly impact the outcome of your contouring and highlighting efforts. Brushes are a staple in any makeup kit, and having the right ones can make application seamless. For contouring, an angled brush or a contour brush with dense bristles is ideal for precise application and blending. A fan brush or a tapered highlighter brush works well for applying highlighter, allowing for a light, even distribution of product.
Blending is a crucial step in contouring and highlighting, and this is where beauty sponges come into play. A damp beauty sponge can help blend out harsh lines and ensure that the contour and highlight meld seamlessly with your foundation. This tool is particularly useful for cream and liquid products, providing a smooth, airbrushed finish.
In addition to brushes and sponges, having a good setting powder is essential. After applying your contour and highlight, setting your makeup with a translucent powder can help lock everything in place and reduce shine, ensuring your look lasts throughout the day. A setting spray can also be beneficial, adding an extra layer of longevity and a natural finish to your makeup.
As you become more comfortable with the basics, experimenting with different products and techniques can help you find what works best for you. Practice is key, and over time, you’ll develop a routine that enhances your unique features. Remember, makeup is an art form, and contouring and highlighting are tools to help you express your creativity and confidence.
In conclusion, mastering the basics of contouring and highlighting involves selecting the right products, using the appropriate tools, and perfecting your blending technique. With these essentials in hand, you’ll be well on your way to achieving a beautifully sculpted and radiant look. Whether you’re a makeup novice or a seasoned pro, understanding these fundamentals will set the foundation for stunning makeup application every time.
Step-By-Step Techniques: How To Contour And Highlight For Different Face Shapes
Contouring and highlighting have become essential techniques in the world of makeup, allowing individuals to enhance their natural features and create a more sculpted appearance. Understanding how to contour and highlight for different face shapes can make a significant difference in achieving a flawless look. Whether you have a round, oval, square, or heart-shaped face, mastering these techniques can help you accentuate your best features and create a balanced, harmonious look.
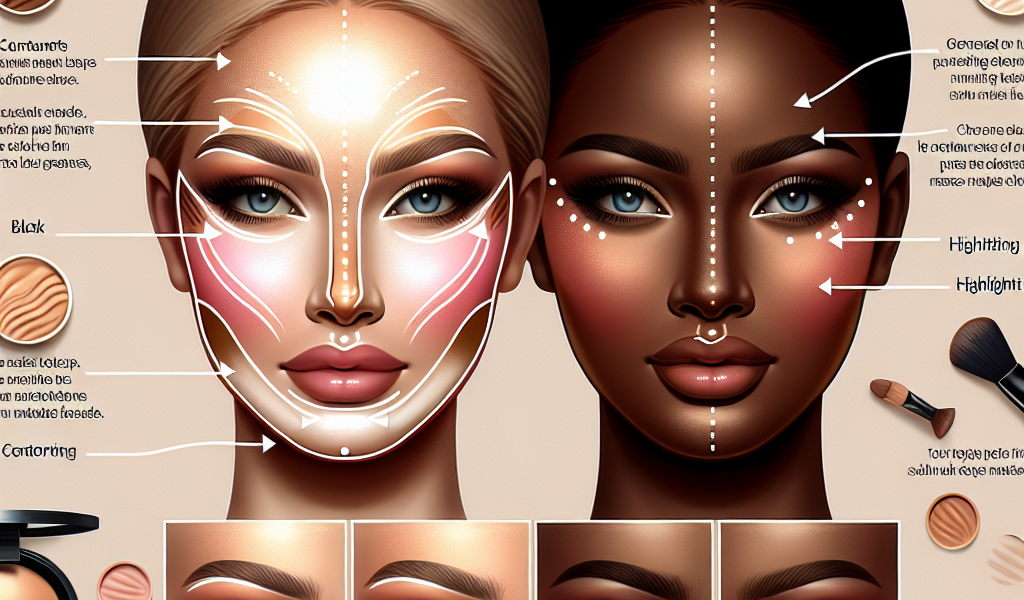
To begin with, it is crucial to identify your face shape. This will guide you in applying contour and highlight in the most flattering way. For those with a round face, the goal is to create the illusion of length and definition. Start by applying a contour shade along the temples, under the cheekbones, and along the jawline. This will help to slim down the face and add dimension. Next, highlight the center of the forehead, the bridge of the nose, the tops of the cheekbones, and the chin. This will draw attention to the center of the face and create a more elongated appearance.
For individuals with an oval face, the aim is to enhance the natural balance and symmetry. Contour lightly along the sides of the forehead and under the cheekbones to add subtle definition. Highlighting the center of the forehead, the bridge of the nose, the tops of the cheekbones, and the chin will help to maintain the natural harmony of the face. It is important to blend well to ensure a seamless transition between the contour and highlight.
Those with a square face should focus on softening the angles and creating a more rounded appearance. Contour along the sides of the forehead, under the cheekbones, and along the jawline to reduce the prominence of the angular features. Highlighting the center of the forehead, the bridge of the nose, the tops of the cheekbones, and the chin will help to draw attention to the center of the face and create a more balanced look. Blending is key to achieving a natural finish.
For a heart-shaped face, the goal is to balance the width of the forehead with the narrower chin. Contour along the sides of the forehead and under the cheekbones to reduce the width of the upper face. Highlighting the center of the forehead, the bridge of the nose, the tops of the cheekbones, and the chin will help to draw attention to the center of the face and create a more harmonious appearance. Blending well is essential to ensure a smooth transition between the contour and highlight.
In addition to understanding where to apply contour and highlight, it is important to choose the right products and tools. A matte contour powder or cream that is one to two shades darker than your natural skin tone works best for creating shadows. For highlighting, a product that is one to two shades lighter than your skin tone with a subtle shimmer will help to reflect light and create a radiant glow. Using a combination of brushes and sponges can help to achieve a precise and blended application.
In conclusion, contouring and highlighting can transform your makeup routine and enhance your natural beauty. By understanding your face shape and applying these techniques strategically, you can create a more sculpted and balanced appearance. Remember to blend well and choose the right products to achieve a flawless finish. With practice and patience, you can master the art of contouring and highlighting and enjoy the confidence that comes with a beautifully enhanced look.
Common Mistakes To Avoid: Tips For Flawless Contouring And Highlighting
Contouring and highlighting have become essential techniques in the world of makeup, offering the ability to sculpt and define facial features with precision. However, achieving a flawless look can be challenging, especially for beginners. One common mistake is choosing the wrong shades for your skin tone. It’s crucial to select contour and highlight products that complement your natural complexion. Using shades that are too dark or too light can result in an unnatural appearance. To avoid this, test products on your jawline before purchasing to ensure they blend seamlessly with your skin.
Another frequent error is over-applying product. While it might be tempting to layer on contour and highlight for a dramatic effect, less is often more. Start with a small amount and build up gradually. This approach allows for better control and prevents the makeup from looking cakey or heavy. Blending is equally important; harsh lines can ruin the illusion of natural shadows and highlights. Use a damp beauty sponge or a soft brush to blend the edges, ensuring a smooth transition between the contoured and highlighted areas.
Placement is another critical factor. Misplacing contour and highlight can distort your facial features rather than enhance them. Contour should be applied to areas where shadows naturally fall, such as the hollows of the cheeks, the sides of the nose, and the jawline. Highlight, on the other hand, should be placed on the high points of the face, like the tops of the cheekbones, the bridge of the nose, and the brow bone. Understanding your face shape can help you determine the best placement for these products.
Lighting plays a significant role in makeup application. Applying contour and highlight in poor lighting can lead to uneven or exaggerated results. Natural daylight is ideal for makeup application, as it provides the most accurate representation of how your makeup will look in various settings. If natural light isn’t available, opt for a well-lit vanity mirror with adjustable brightness to mimic daylight as closely as possible.
Using the wrong tools can also hinder your contouring and highlighting efforts. Brushes and sponges designed specifically for these techniques can make a significant difference. For contouring, angled brushes are excellent for precision, while fluffy brushes are great for blending. For highlighting, fan brushes or small, tapered brushes can help you apply product precisely where you want it. Investing in quality tools can elevate your makeup game and make the process more enjoyable.
Lastly, neglecting to set your makeup can lead to a less polished finish. After applying contour and highlight, use a setting powder or spray to lock everything in place. This step not only prolongs the wear of your makeup but also helps to blend the products further, creating a cohesive look. Setting your makeup ensures that your hard work stays put throughout the day, maintaining that flawless finish.
In conclusion, mastering the art of contouring and highlighting requires attention to detail and practice. By avoiding common mistakes such as choosing the wrong shades, over-applying product, misplacing contour and highlight, working in poor lighting, using inappropriate tools, and neglecting to set your makeup, you can achieve a flawless, natural-looking result. With these tips in mind, you’ll be well on your way to perfecting your contouring and highlighting skills, enhancing your natural beauty with confidence.
Conclusion
In conclusion, “The Ultimate Guide to Contouring and Highlighting” provides comprehensive techniques and tips for enhancing facial features through makeup. It covers the essential tools, products, and step-by-step instructions for achieving a sculpted and radiant look. By mastering these techniques, individuals can accentuate their natural beauty and create a variety of makeup styles suitable for different occasions.